vSphere 6.7 install vCSA 6.7
When you plan the upgrade of your virtual infrastructure to latest VMware vSphere 6.7, first step to take is a new installation of the vCSA component.
The upgrade process must be planned carefully to avoid services disruption or data loss. Since the first vSphere component to configure is always the vCenter Server, you have the option to perform a fresh installation or an upgrade from a previous version. Currently the vCSA direct upgrade to version 6.7 is supported for the vCSA 6.0 or above with the exclusion of version 6.5 U2 but it was announced during VMworld 2018 US that migration from 6.5 U2 will be supported with the upcoming vCSA 6.7 U1 update release.
Blog Series
vSphere 6.7 install vCSA 6.7 - pt.1vSphere 6.7 upgrade vCSA 6.5 to 6.7 - pt.2
vSphere 6.7 upgrade ESXi 6.5 to 6.7 - pt.3
vSphere 6.7 upgrade vSAN 6.6 to 6.7 - pt.4
Pre-requisites
Because VMware vSphere infrastructure strongly depends on DNS, before proceeding with the installation of the vCSA you have to configure the A record in your DNS Server that points to the new vCenter Server.In your DNS Server (Windows version in the example) create a new A record.
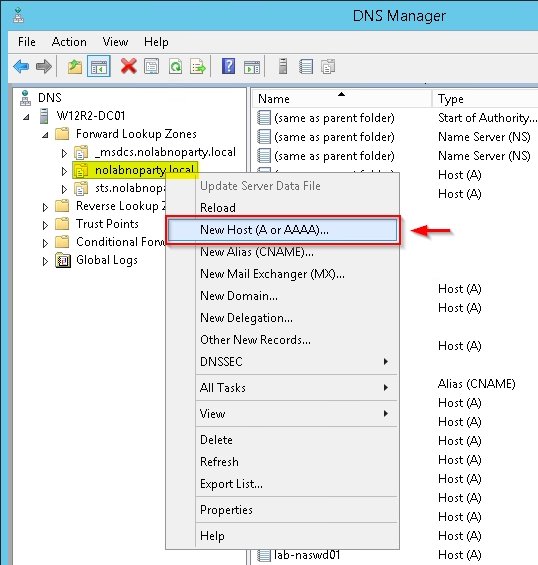
Specify the DNS name and the associated IP address.

When the DNS entry has been created, you can begin the installation.
Install the vCSA
To perform a new install of the vCenter Server Appliance (vCSA), from the VMware website download the latest version of the vCSA in .ISO format. Mount the ISO and select the appropriate installer based on the OS from which the installation is executed. The installation can be launched from one of the supported OSs: Windows, Linux, and MacOS.The installation of the vCSA is a two stage process:
- Stage 1 - Deployment
- Stage 2 - Configuration
Stage 1 - Deploy appliance
If your OS is Windows, access the vcsa-ui-installer > win32 directory and run the installer.exe.
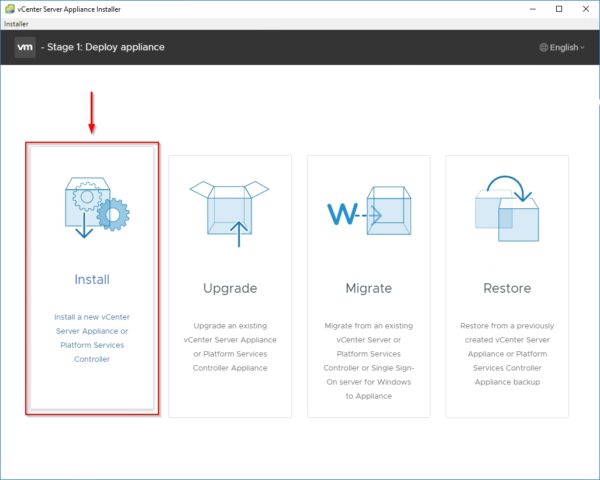
From the installation wizard, click Install to proceed with the installation of a new vCenter Server.
Click Next.

Accept the EULA then click Next.

Select the deployment type. You can deploy a vCenter Server with an Embedded PSC suitable for medium to small environments or install a standalone PSC and vCenter Server for a more complex infrastructure. Click Next.

Specify the target ESXi host where to install the vCSA and enter the root credentials. Click Next.

Click Yes to accept the SSL certificate from the selected host.

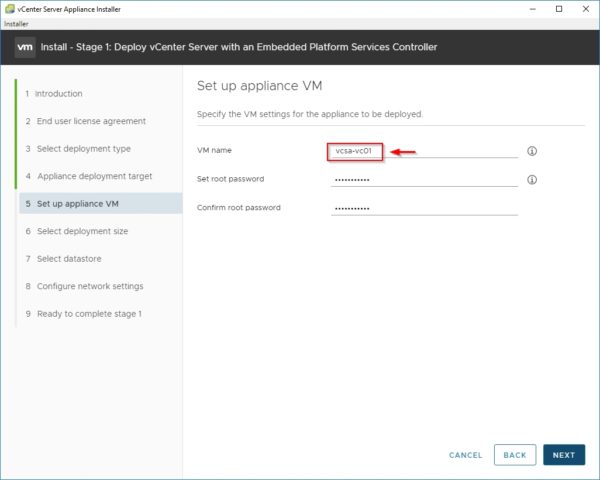
Enter the VM name for the vCSA and type the password in the Set root password field. Click Next to continue.
Based on your environment, specify the Deployment size and the Storage size then click Next.

Select the datastore to use and click Next.

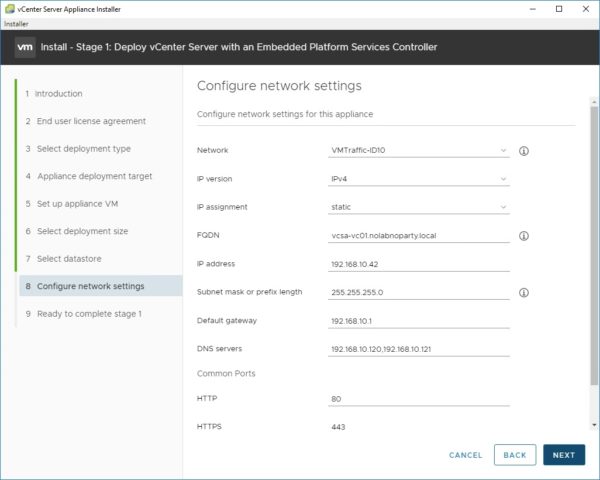
Configure the network settings and click Next.
Click Finish to start the installation.

The vCSA is deployed in the specified target system.

When Stage 1 has completed successfully, click Continue to continue the installation. You can also exit the wizard and continue the installation at any time by typing in your favorite browser the address reported in the window.

Stage 2 - Set Up the vCSA
When Stage 2 window is displayed, click Next to begin the configuration process.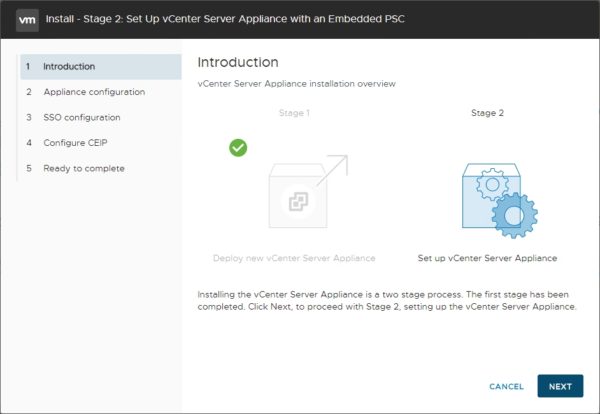
Because the infrastructure must be time synced to avoid authentication issues, specify the NTP Server and optionally enable the SSH access. Click Next.

Select the Create a new SSO domain option and type the SSO domain name. Specify the SSO password then click Next.

Optionally join the CEIP then click Next.

Click Finish to finalize the deployment.

Click OK to proceed.

The setup process is being executed.

When Stage 2 has successfully run, the vCSA deployment is complete. Click Close to exit the wizard.

To access the Appliance Management, type the address https://IP_vCSA:443 in your favorite browser and enter the root credentials. Click Login.

The Appliance Management dashboard.

To access the vCSA through the vSphere Client (HTML5 based), type the address https://IP_vCSA/ui in your favorite browser and enter the administrator@ssodomain.local credentials. Click Login.

The vSphere Client 6.7 dashboard.

When the vCSA deployment procedure has been completed, you can start configuring your environment by creating vSphere objects such as datacenters, clusters, and so on.
A fresh install is a suggested option if you are managing a small environment or if the vCenter Server in use is pretty messed up. Part 2 will cover the upgrade from an existing vCSA 6.5 to the new 6.7 version.
source :
https://nolabnoparty.com/en/vsphere-6-7-install-vcsa-6-7-pt-1/
0 Response to "vSphere 6.7 install vCSA 6.7"
Post a Comment